How to Draw Acanthus Leaves, Step by Step
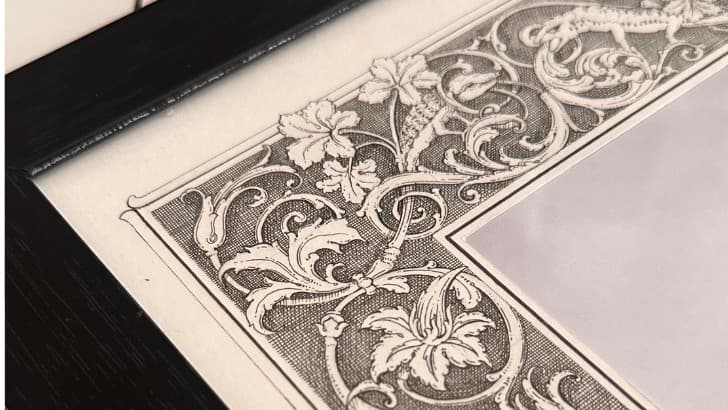
The acanthus is a real plant, a Mediterranean herb with deeply cut, glossy leaves, but the version we draw is far older than any drawing manual. The Greeks carved it onto the Corinthian capital, the Romans spread it across every frieze and scroll they touched, and ornament artists have been drawing it ever since. If you want to learn how to draw acanthus leaves, you are joining a very long queue. Happily, the method was worked out centuries ago; someone just needs to hand it to you in the right order.
That is what this post is. Six steps, from the first pencil line to the last stroke of ink. You will need an HB pencil, a soft eraser, smooth paper (ordinary 120 gsm cartridge paper is fine) and a fineliner or two. Set aside twenty minutes for your first attempt, and expect it to be wobbly. Mine certainly was.
How to draw an acanthus leaf in six steps
The order matters more than anything else here. Every step builds on the one before it, so resist the urge to jump ahead to the pretty serrated edges. They come last for a reason.
Step 1: Draw the gesture line
Every acanthus leaf hangs off a single curve, the spine. Draw one long, relaxed C curve, a little straighter near the base and curling more as it rises to the tip. Draw it from your shoulder, not your fingers, and draw it quickly. A slow, careful spine is nearly always a stiff spine.
Do this five or six times on scrap paper and keep the one with the most life in it. That sounds excessive for one line, but this line is the whole leaf. Everything else is decoration attached to it.
Step 2: Block the main lobes as simple masses
Divide the spine into four or five sections, and at each division draw a lobe as a plain rounded mass, something like a mitten or a paddle. No serrations yet, no detail, just the big shapes. Make the lobes near the base the largest and let them shrink as they climb towards the tip.
Notice what the curve does to them. Lobes on the outside of the curve stretch and open up. Lobes on the inside compress and overlap each other. Let that happen. It is what makes the leaf look like it is bending, rather than pasted flat on the page.
Step 3: Place the eyes
Here is the part that separates acanthus from generic foliage. Where two lobes meet, they pinch together and trap a small pocket of negative space, usually shaped like a teardrop or a comma. Ornament artists call these pockets the eyes.
Mark one eye at each junction, seated right in the pinch where the lobes touch, then check that the eyes fall along a smooth curve echoing the spine; scattered eyes make the leaf look broken. They are small, but they carry a huge amount of the leaf's character, and a leaf without them reads as a vague fern.
Step 4: Run the pipes from the eyes to the spine
From each eye, draw a ridge flowing down into the spine. These ridges are often called pipes, and they behave like folds in heavy fabric: they begin at the eye, swell a little, and merge into the spine the way streams join a river.
Pipes are what turn a flat pattern into a form. They explain how the surface of the leaf rises and falls, and later, when you shade, they are where most of your tone will live. Keep them curved, let them flow in the same general direction as the spine, and make sure every one of them starts at an eye. A pipe that starts from nowhere looks like a scratch.
Step 5: Refine the edges and cuts
Now, at last, the serrated edge. Break the smooth outline of each lobe into smaller pointed fingers, the cuts. Three to five per lobe is plenty. Vary them: some long, some short, some leaning one way, some the other. The cuts should angle back towards the eyes, as if the whole edge had been combed in that direction.
While you are here, tidy the drawing. Soften your construction lines with the eraser until they are only just visible, and correct any lobe that has drifted away from the spine.
Step 6: Ink it, then clean up
Ink in this order: the spine first, because every other line refers to it. Then the eyes and the pipes. Then the outer edge last. I use a 0.5 fineliner for the spine and the outer silhouette, and a 0.3 or 0.1 for the pipes and interior lines, so the outside of the leaf sits heavier than the inside.
Let the ink dry fully, a few minutes at least and longer in humid weather; erasing over half-dry ink smears lines you cannot get back. Then erase the pencil with a soft eraser, sweeping in one direction. If a line looks broken after erasing, go back over it once. And that is a complete acanthus leaf.
If you would rather watch these stages drawn in real time, with all the pauses and corrections left in, my course Fundamentals of Acanthus Leaf walks through each one on camera, lobe by lobe.
A studio note: I still start most mornings with spines. Five minutes of loose curves on scrap paper, nothing precious. The leaf I draw afterwards is always better for it.
Common mistakes, and how to fix them
These four come up again and again in student work, so check your drawing against them before you ink.
- A stiff spine. Usually caused by drawing slowly and hoping accuracy will save it. It will not. Draw the spine faster and larger than feels comfortable, and pick the best of several rather than nursing one.
- Equal-sized lobes. If every lobe matches, the leaf looks stamped out by a machine. Make the base lobes noticeably bigger, let them diminish towards the tip, and vary the gaps between them a little too.
- Floating eyes. An eye that is not seated in the pinch between two lobes, or that has no pipe leaving it, is just a stray mark. Every eye must be trapped by the lobes around it and must send a pipe to the spine.
- One line weight everywhere. Outlining every element with the same pen gives you a colouring book page. Save your heaviest line for the spine and the outer silhouette, cuts included, use a middle weight for the pipes, and keep the finest line for interior details and veining.
Where to take it next
A single leaf is the alphabet. The sentences are scrolls, borders, rosettes and cartouches, and nearly all of them are built from this same leaf bent onto new curves. Once you are comfortable drawing a leaf on its own, Fundamentals of Acanthus Design shows you how to attach it to scrolling stems and grow it into full compositions.
And if the hardest part for you is simply practising regularly, that is what the OB Art Circle is for. We run monthly live workshops and short drills, and there is a private community where you can post your wobbliest leaves and get an honest, kind eye on them. Drawing alongside other people does more for your acanthus than any single tutorial can.
A few questions I often get
Which pens should I use for acanthus leaves?
Ordinary fineliners are perfect. I keep a 0.1, a 0.3 and a 0.5 on my desk, and the sizes matter far more than the brand. Anything that gives a steady, consistent line on smooth paper will do the job.
Should I draw from a real acanthus plant?
Not for this. The ornamental acanthus is a stylised form with its own rules, refined over centuries of carving and drawing, and it has drifted a long way from the living plant. You will learn more from photographs of carved capitals and plaster casts than from the plant itself.
How long before my leaves look right?
With ten minutes of practice a day, most people get a convincing spine and readable eyes within two or three weeks. The refinement, the confident cuts and the clean line weights, takes longer, and honestly it never quite stops improving. Ten minutes daily will beat two hours on a Sunday every time.
Comments
Loading…