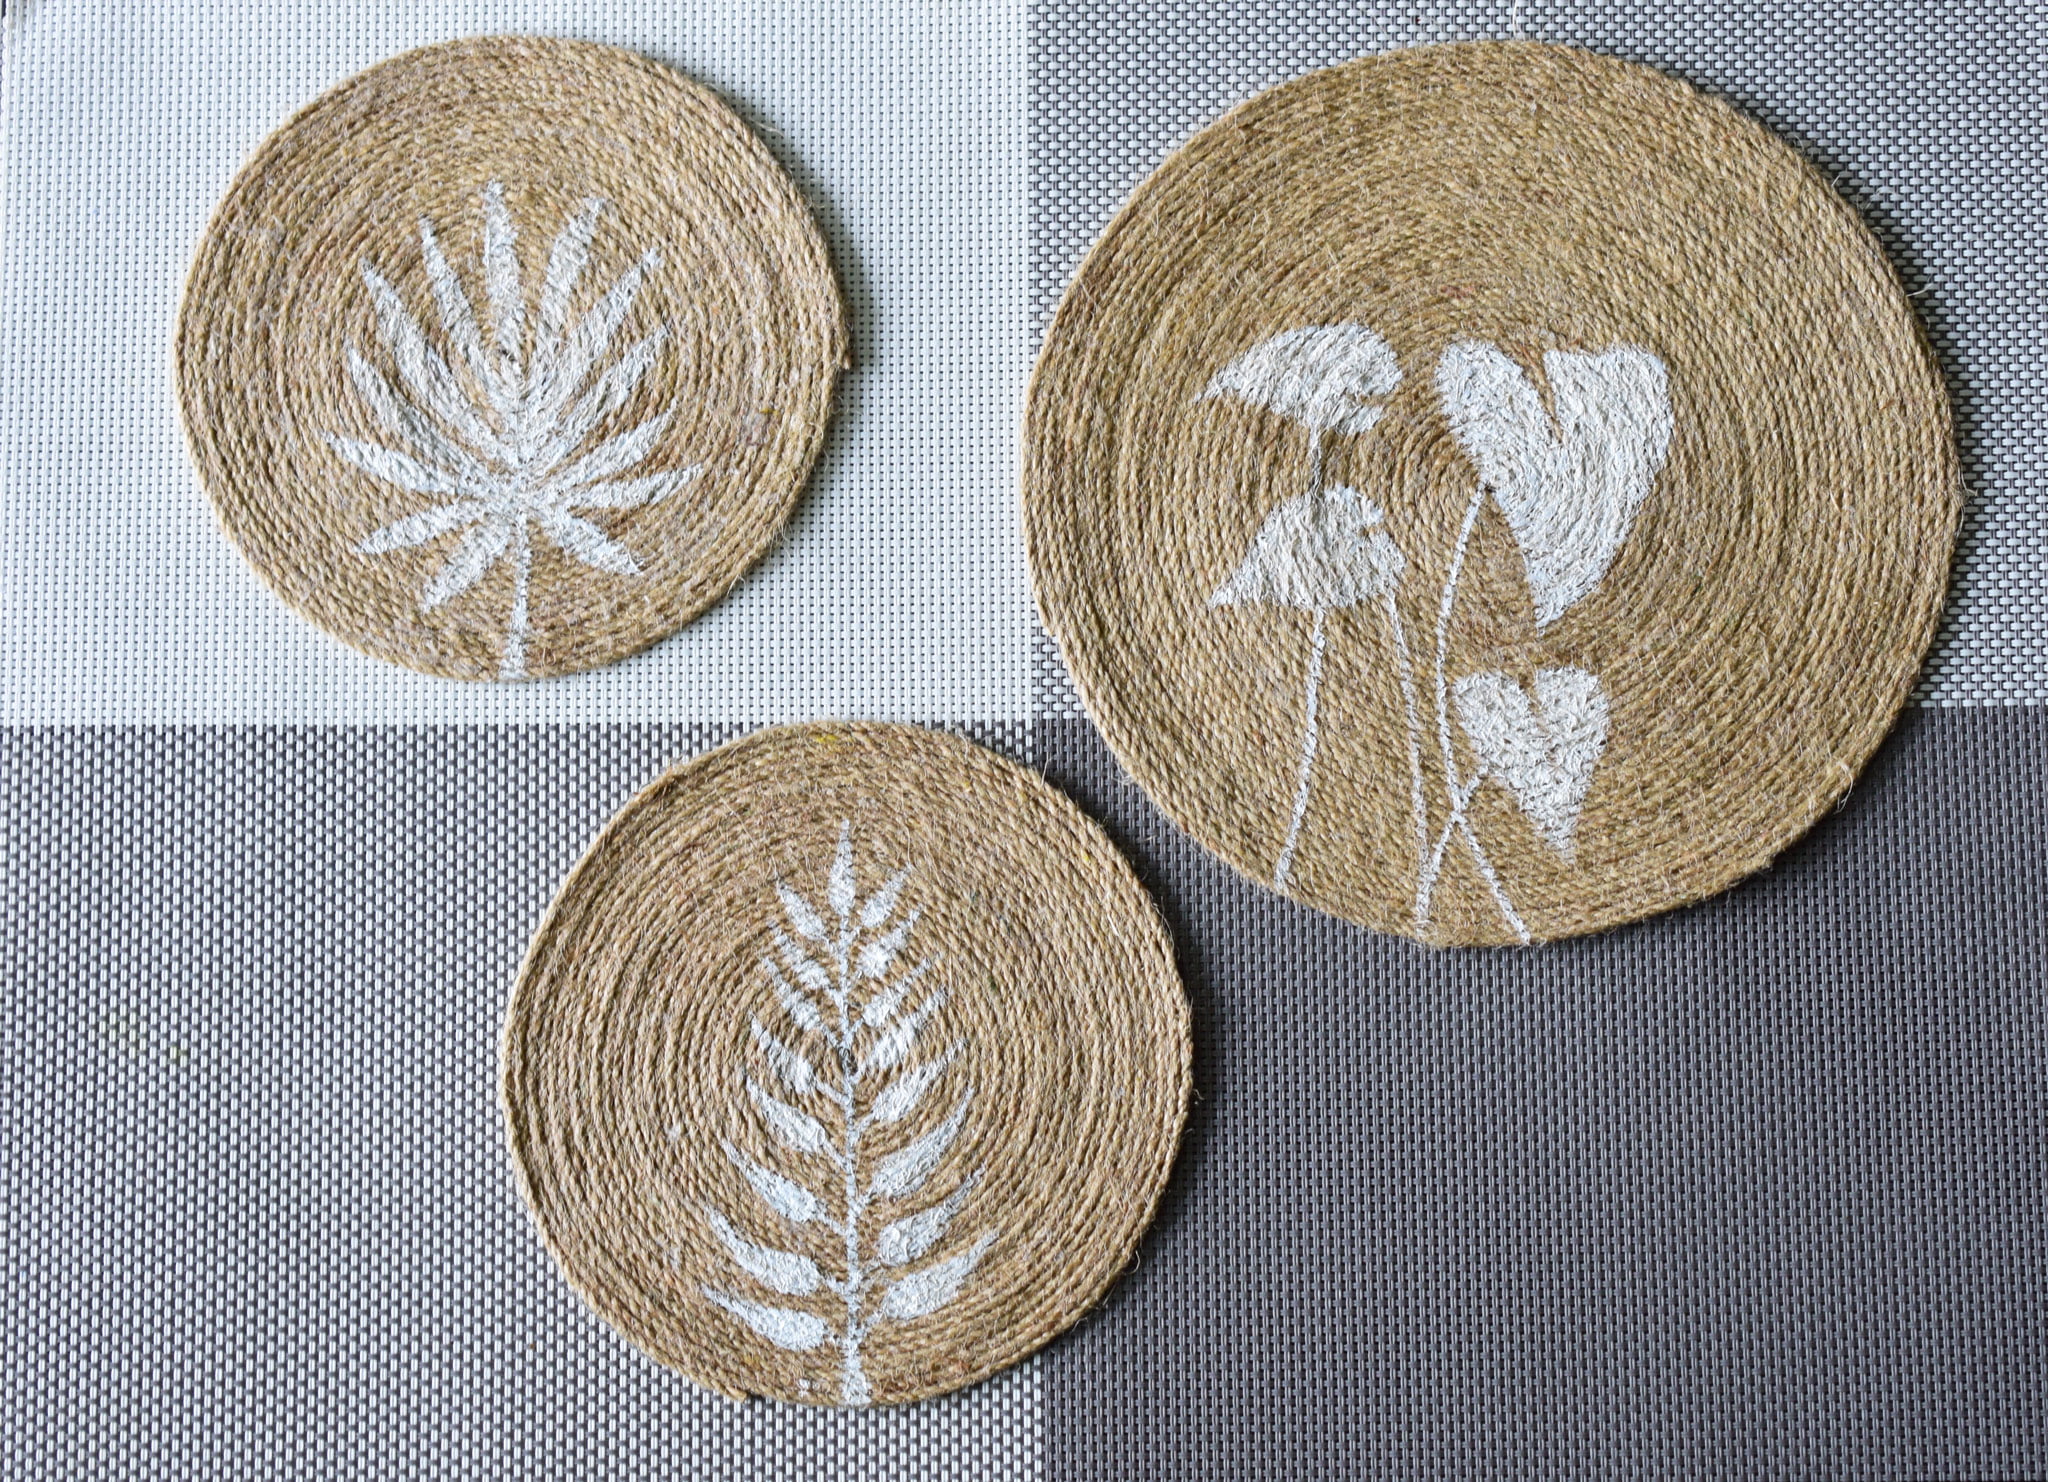
DIY WALL ART

Hola DIY-ers!
This is my second monsoon in Mumbai, barely forgotten my first one. Monsoons in Mumbai are adventurous, seriously ask anyone here and you'll get the same answer. During weekdays, I somehow manage to reach home safe. However, during weekends, I barely move out of my place. Enough of chit-chatting let us come to work. For this post, I've decided to decorate my bedroom corner, although my plants majorly draw attention and create a cosy corner. Now to add a little more to it, I thought of my walls to give a makeover. Let's freshen up a bit with this wall art decor idea. This is not new to me, I have already used this idea of coiling a jute yarn earlier as well in one of my posts.
Material Required:
- Jute Yarn
- Glue
- Brushes
- Acrylic Paint
Process:
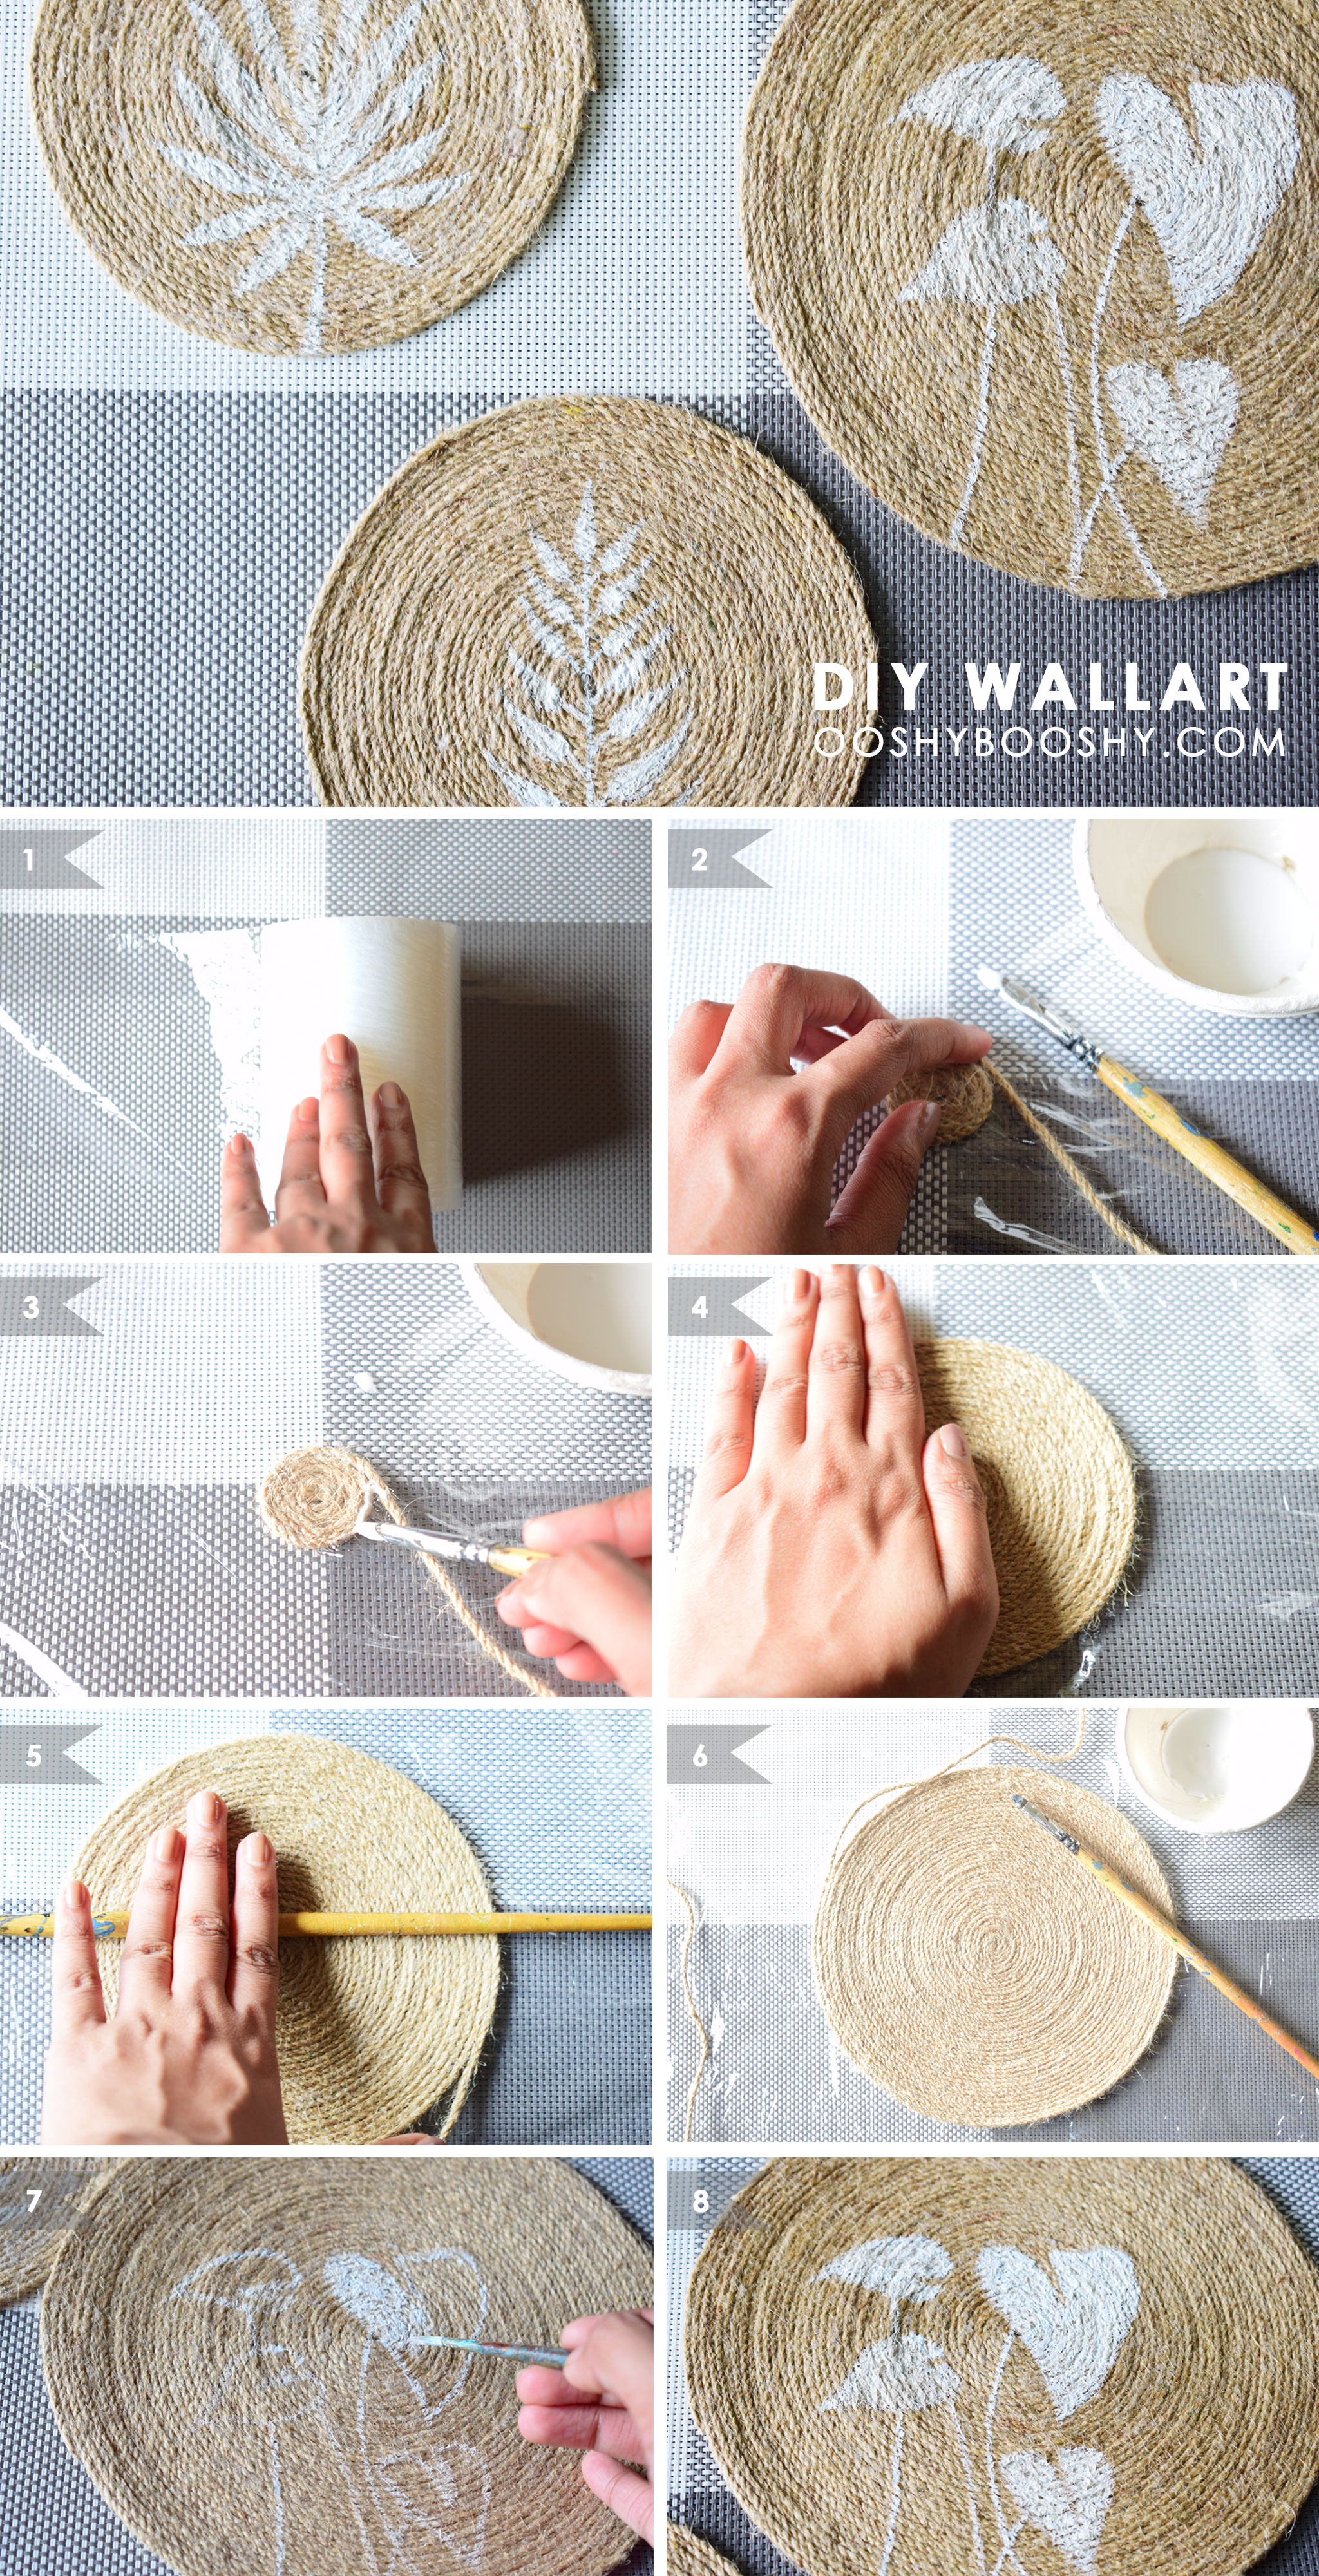
Step 1: Cover the base with plastic because it is going to be messy.
Step 2: Start with a long piece of jute yarn and start coiling it. After 3-4 rotations, apply glue on top and let it dry and hold it tightly.
Step 3: Just apply glue on the edges of the coiled yarn and keeping rotating. Application of glue on yarn and rotation of yarn on that glued yarn is a simultaneous process.
Step 4: Tap the coil with your palm to flatten it.
Step 5: It is important to avoid the uneven surface of the coil, therefore, just roll the brush body on the coil to make it flat.
Step 6: Once you are satisfied with the size of the coil, cut the extra yarn.
Step 7: Select the pattern you wanted to paint on the coil and apply a minimum of two coats of acrylic paint it to make clean and smooth.
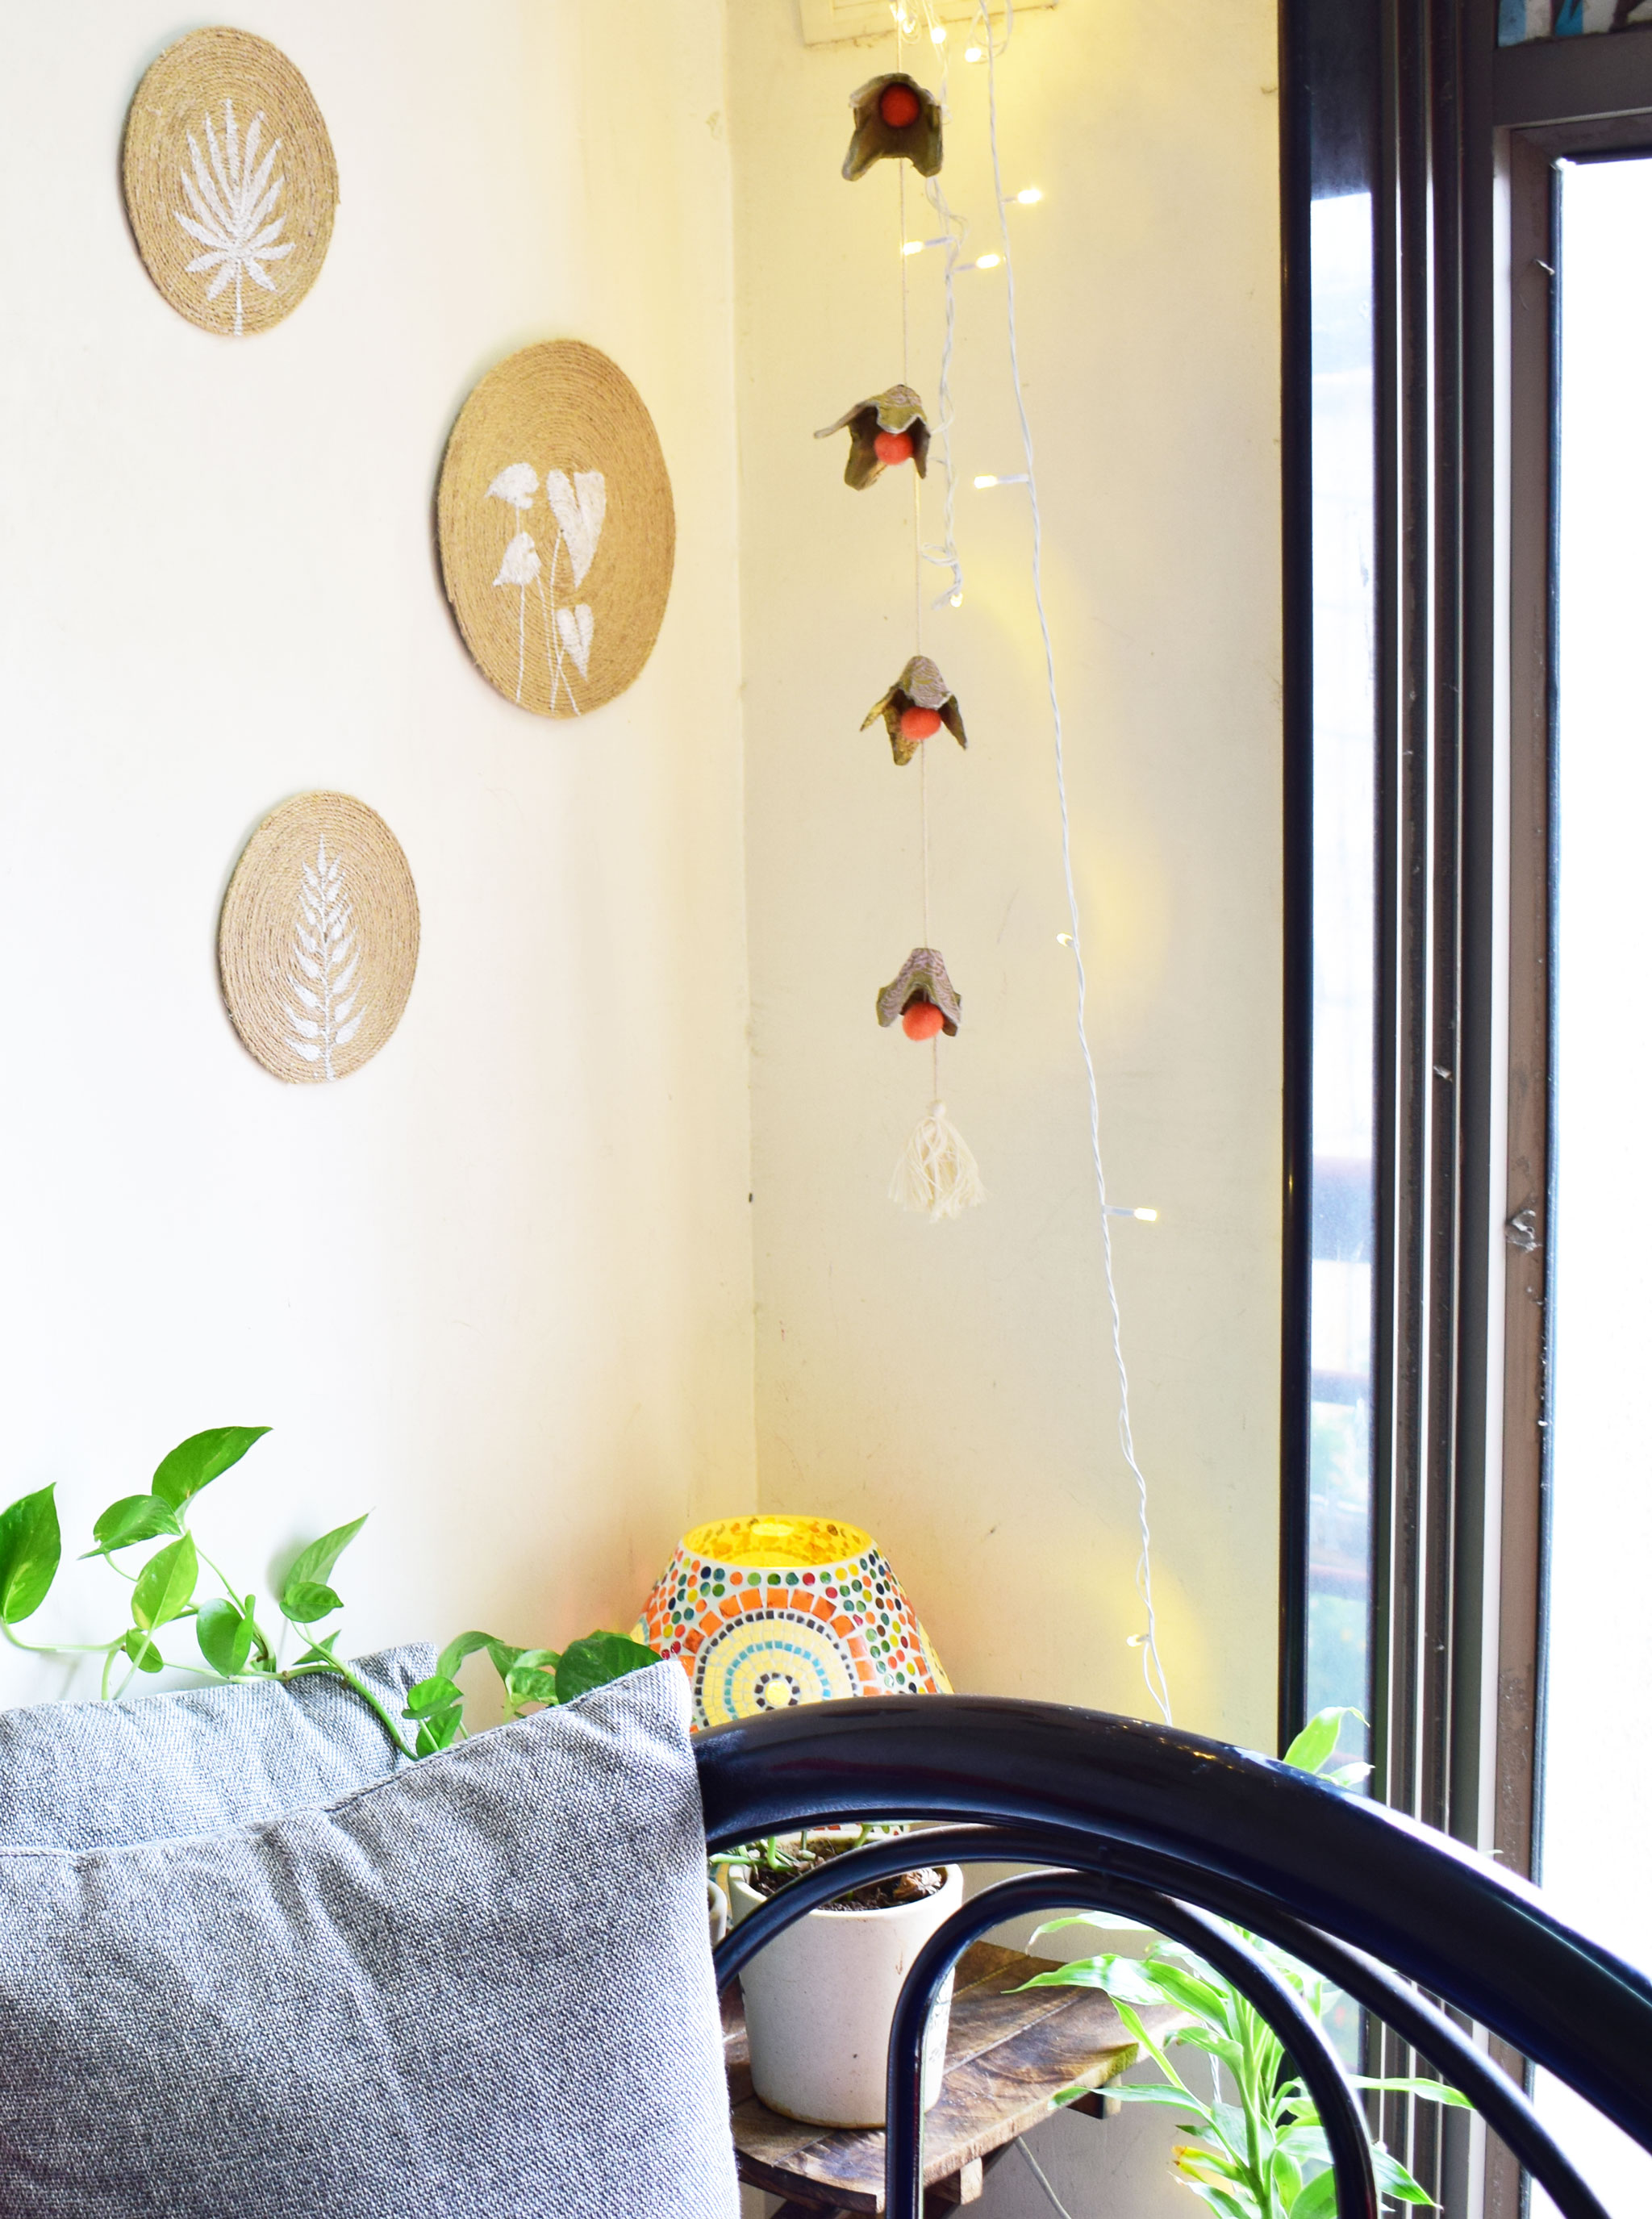
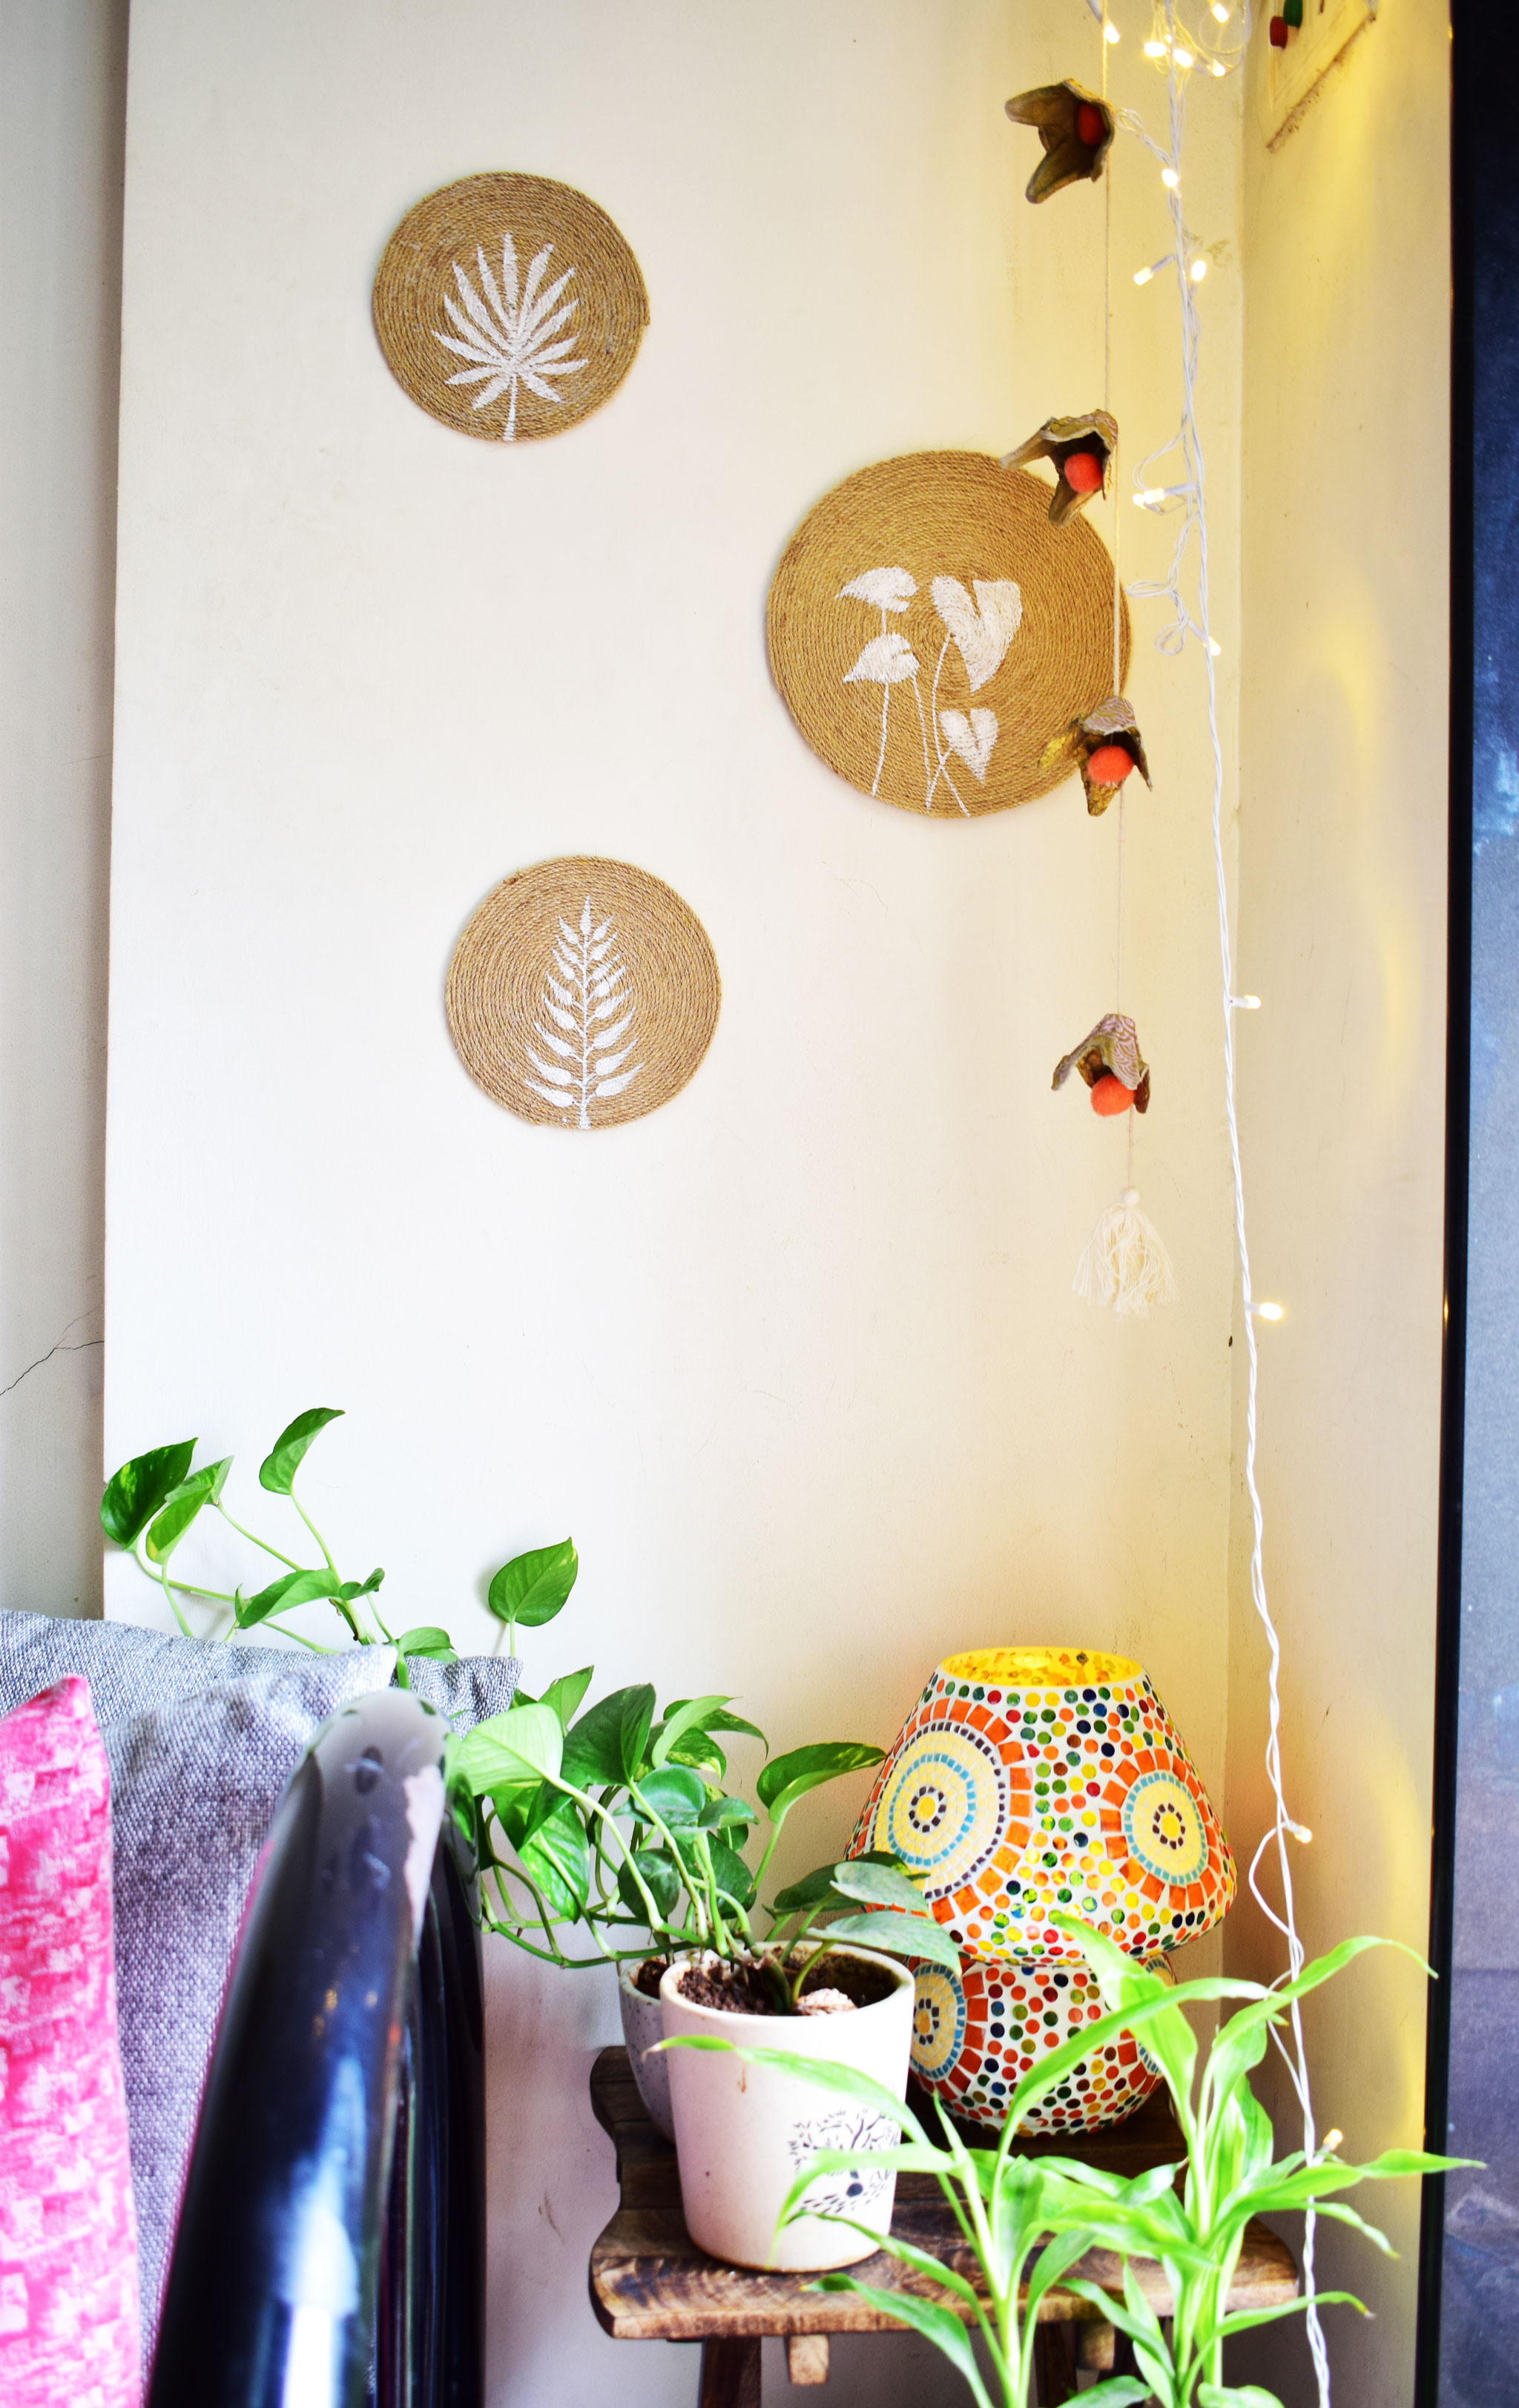
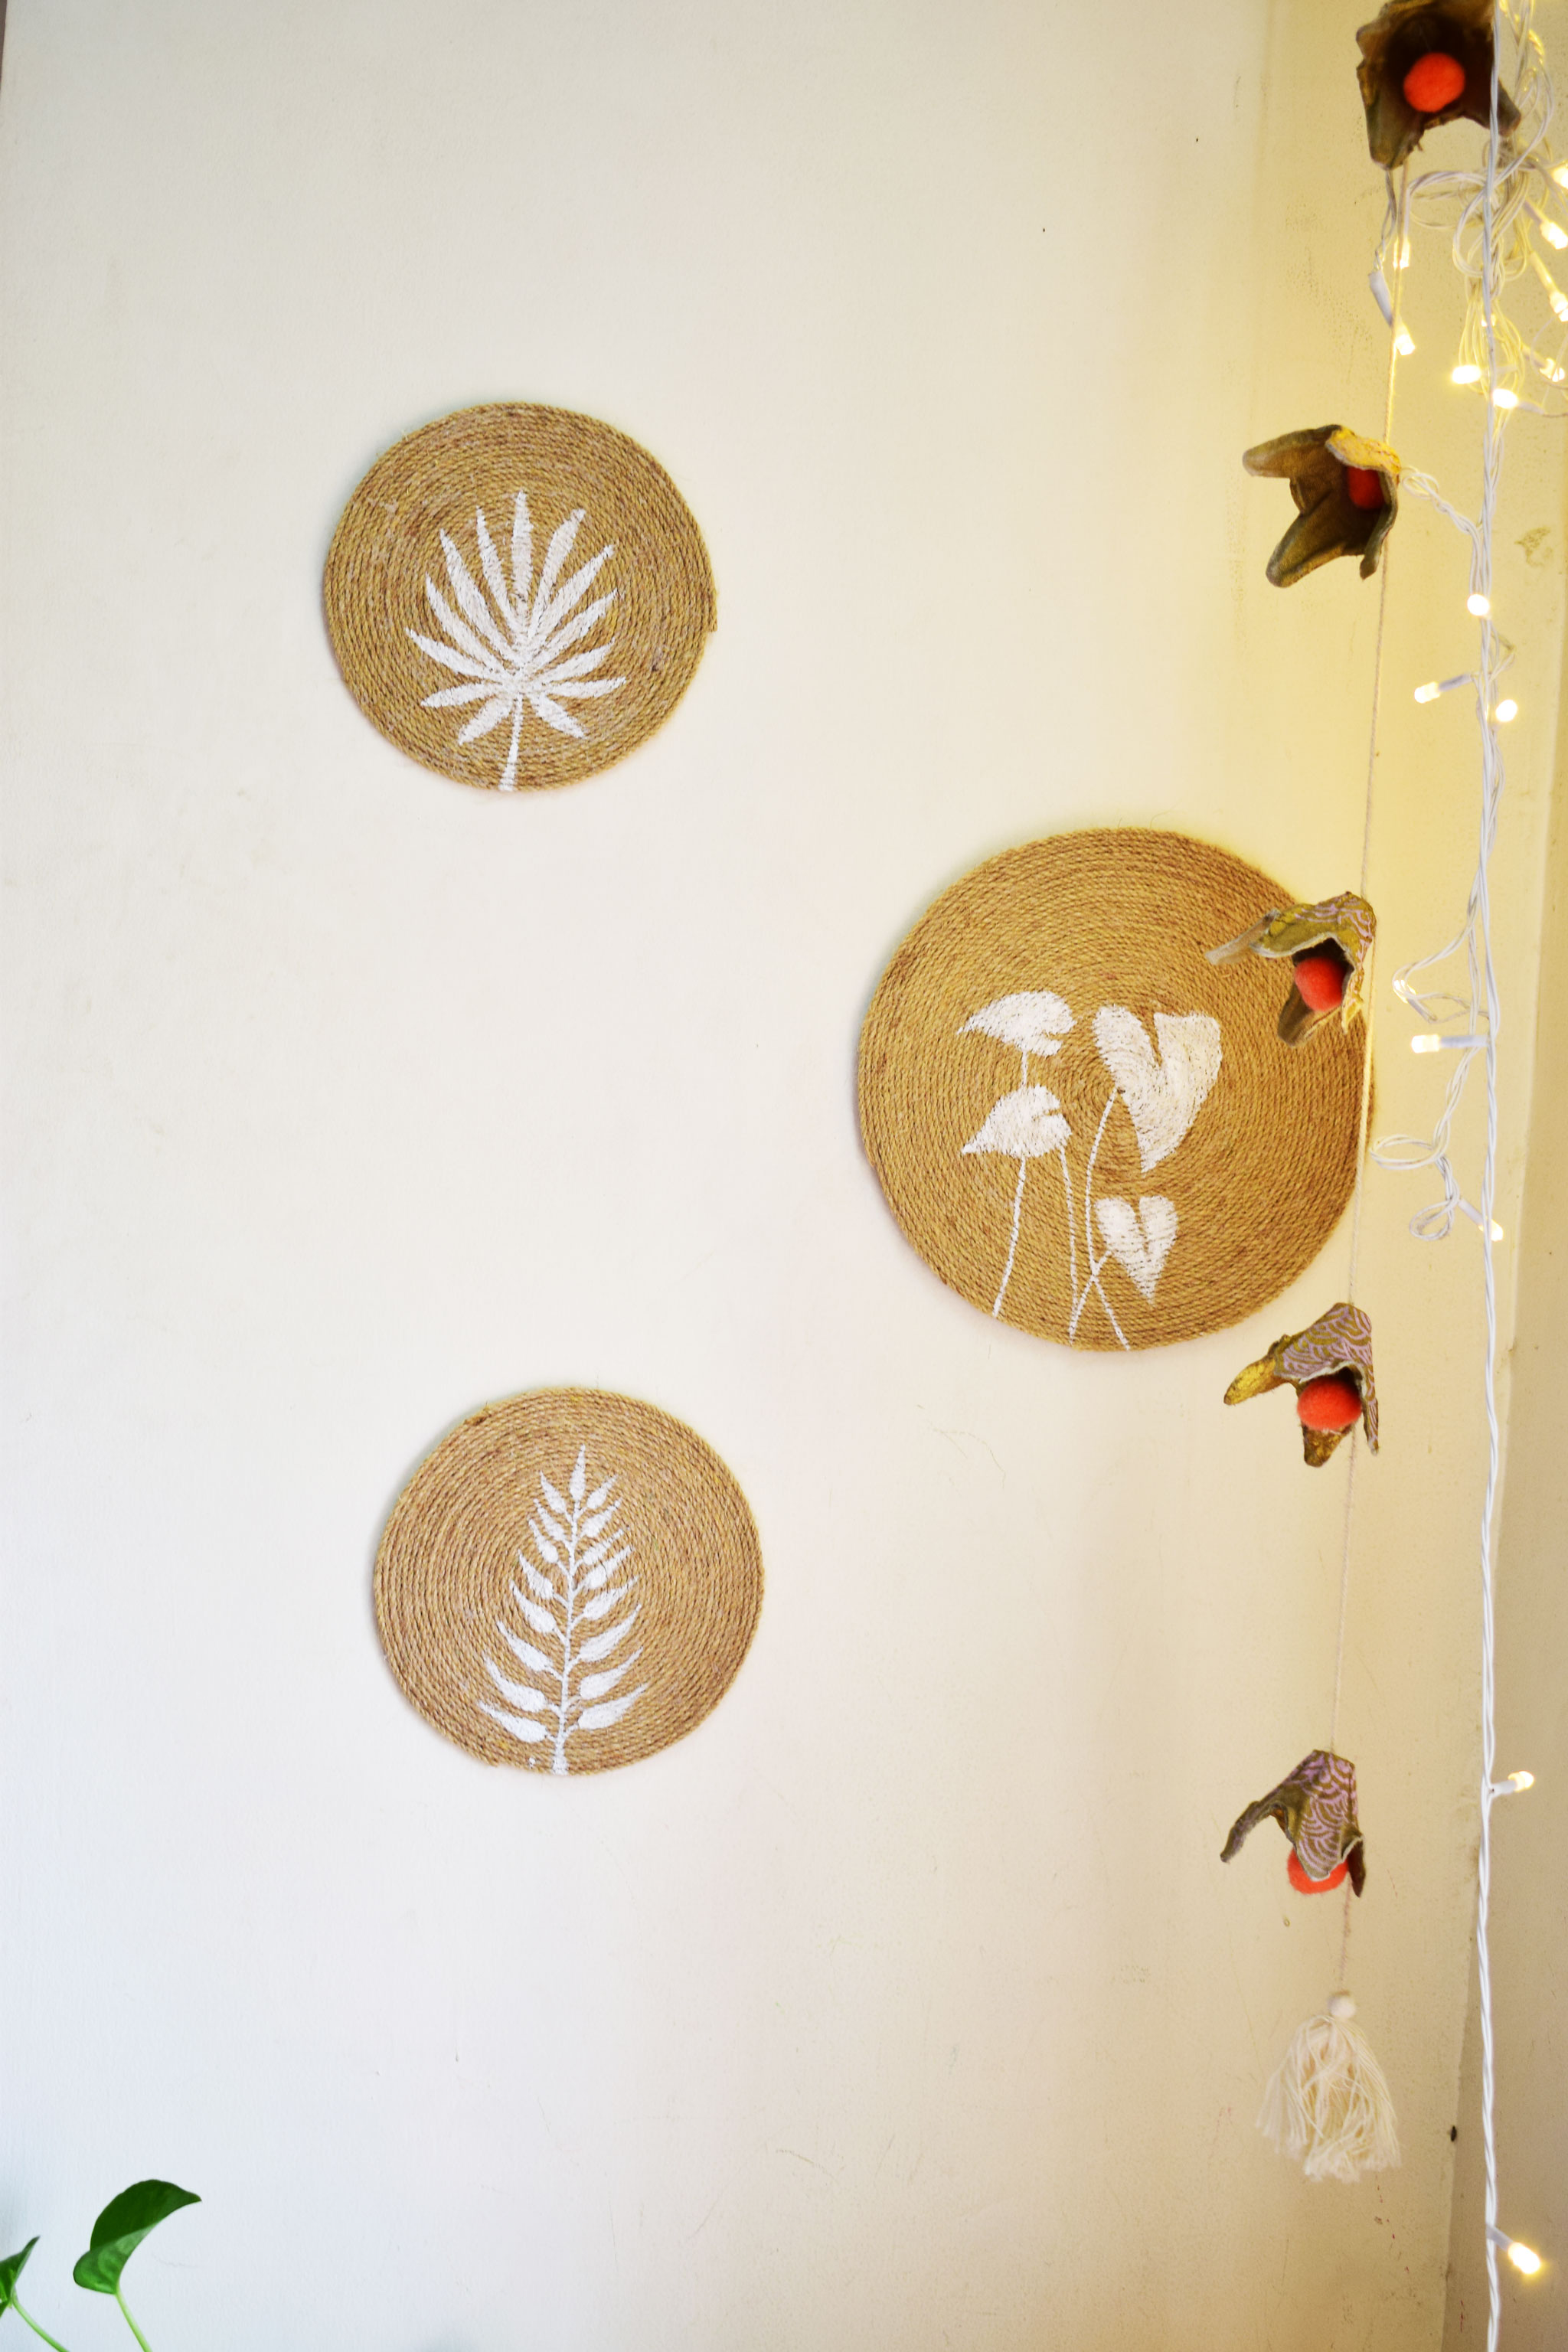
Did you like my cosy corner? or Any suggestions?
Please comment below.
Till then Happy Crafting!